新款vue-cli之create-vue源码阅读总结

最近vue3已成为默认版本,而新版脚手架create-vue也随之浮出水面 正如它的介绍"An easy way to start a Vue project"一样,源码也是清晰易懂 下面对其用到的知识点做个总结:
使用方式
远程命令
npm init vue@3

# 其实背后的逻辑是npm做了个转换:
# 参见:
# https://docs.npmjs.com/cli/v6/commands/npm-init
# https://juejin.cn/post/6948202986573135908

#即等效于
# npx create-vue@3
clone源码运行
cd create-vue
npm run build # 将index.js转成commonjs形式,输出outfile.cjs
node outfile.cjs
远程命令也是运行的outfile.cjs文件, 可参加package.json中的bin配置
{
  "bin": {
    "create-vue": "outfile.cjs"
  },
}
package.json中设置type: 'module'
源码package.json中设置了type: 'module',意思是说如果js文件采用的是es module格式书写,可以不用转换成demo.cjs
// demo.js
import path from 'path';

consoloe.log(path)
node demo.js

# 如果没有type: 'module'配置,需要转成demo.cjs
template增量覆盖
// 思路:简洁 清晰 易懂
const templateRoot = path.resolve(__dirname, 'template')
const render = function render(templateName) {
  const templateDir = path.resolve(templateRoot, templateName)
  renderTemplate(templateDir, root) // utils\renderTemplate.js
}

// 首先拉取template/base作为初始化模板
render('base')

// 比如这里用户选择了jsx,则拉取template/config/jsx
// 然后renderTemplate函数去做merge即可
if (needsJsx) {
  render('config/jsx')
}
// ...
命令行参数解析
相当于vue-cli中commander的简化版本
查看源码(index.js),可以看到cli预设了一些默认参数,如下:
// --default
 // --typescript / --ts
 // --jsx
 // --router / --vue-router
 // --pinia
 // --with-tests / --tests (equals to `--vitest --cypress`)
 // --vitest
 // --cypress
 // --eslint
 // --eslint-with-prettier (only support prettier through eslint for simplicity)
 // --force (for force overwriting)
当使用预设参数后,将跳过问题询问,直接拉对应模板到本地,比如:
npx create-vue@3 --ts

# 不过 npm init vue@3 --ts 居然没有生效,不知道作者是不是没有测试
问题答案统计
统计问题答案,并以对象的形式输出 相当于vue-cli中使用的inquirer

gradient-string
Beautiful color gradients in terminal output

源码路径:utils\banner.js
// generated by the following code:
//
// require('gradient-string')([
//   { color: '#42d392', pos: 0 },
//   { color: '#42d392', pos: 0.1 },
//   { color: '#647eff', pos: 1 }
// ])('Vue.js - The Progressive JavaScript Framework'))
//
// Use the output directly here to keep the bundle small.

const banner =
  '\x1B[38;2;66;211;146mV\x1B[39m\x1B[38;2;66;...'

export default banner
文字颜色格式化
Tiny library to put colors into stdin/stdout 相当于vue-cli中使用的chalk

pinia
一个更加简洁的状态管理
vitest
参见以下文章
git submodule
基操,这里不做过多介绍 playground文件夹就是个submodule
# 源码根目录下
git submodule init
git submodule update
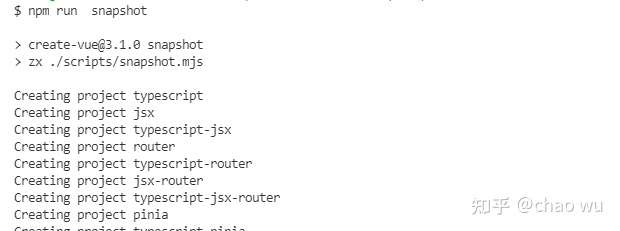
js语法书写shell
以js的方式去写shell脚本
- 源码中的使用:
scripts\snapshot.mjs 需要先npm run build
#!/usr/bin/env zx
import 'zx/globals'

$.verbose = false

const featureFlags = ['typescript', 'jsx', 'router', 'pinia', 'vitest', 'cypress']

// The following code & comments are generated by GitHub CoPilot.
function fullCombination(arr) {
  // ...

  return combinations
}

const flagCombinations = fullCombination(featureFlags)
flagCombinations.push(['default'])

// `--with-tests` are equivalent of `--vitest --cypress`
// Previously it means `--cypress` without `--vitest`.
// Here we generate the snapshots only for the sake of easier comparison with older templates.
// They may be removed in later releases.
const withTestsFlags = fullCombination(['typescript', 'jsx', 'router', 'pinia']).map((args) => [
  ...args,
  'with-tests'
])
withTestsFlags.push(['with-tests'])

flagCombinations.push(...withTestsFlags)

const playgroundDir = path.resolve(__dirname, '../playground/')
const bin = path.posix.relative('../playground/', '../outfile.cjs')

cd(playgroundDir)
for (const flags of flagCombinations) {
  const projectName = flags.join('-')
  console.log(`Creating project ${projectName}`)

  await $`node ${[bin, projectName, ...flags.map((flag) => `--${flag}`), '--force']}`
}
pnpm
可自行搜索进行了解
husky7
git hooks
https://typicode.github.io/husky
npm-run-all
https://www.npmjs.com/package/npm-run-all